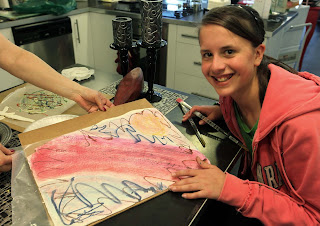
A young student (Elaina) works on an acrylic painting with the impressionist view of a sailboat boat on the water...beautiful composition and color. I especially love the reflection in the water. Elaina assembled and primed her own canvas. She also finished the piece with Modge Podge gloss coating to preserve it and put hangers and wire on the back.
Thursday, April 21, 2011
Wednesday, April 20, 2011
Just For Fun - What is This?
I made this relief print the other day for a special occasion. My husband suggested that I use it as a little challenge for you...what is it? The answer will be posted later today.
Sunday, April 17, 2011
Chocolate Painting
Taking a monment to share another student moment from this week...painting with chocolate. It's actually a reverse print technique using chocolate instead of paper and ink. Joann seems pleased with her work!
Thursday, April 14, 2011
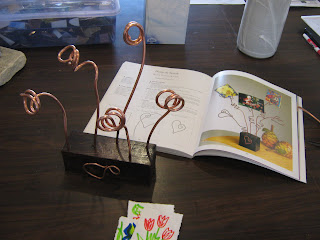
Quick and Easy Wire Picture Frame
Another short and sweet project for a young student learning to work with hand tools...this wire and wood picture frame. Students develop skills with a vice (to hold the wood while drilling), pliers, wire cutters, and drill.
Saturday, April 9, 2011
Edible Art!
We had a great group today for our “Painting with Chocolate” class. This is a seasonal favorite…Easter (and Valentine’s Day of course) are the holidays of chocolate! Today we created reverse paintings using some print making techniques. First the students prepared the base painting with pigments and coconut oil as well as some extruded chocolate lines. Then, the white chocolate was spread over the base. Once cooled, the painting is revealed by flipping and removing the wax paper. Additional surface techniques are then applied. We used extruded chocolate lines, metallic powders, and carving techniques to finish our pieces. Beautiful and delicious – art never tasted so good!
Wednesday, April 6, 2011
Wire Works!
I had a small project lesson with one of my students that I wanted to share. As I've mentioned before, I will often build on a skill with a younger student so that a project which might have been beyond their skill level without any experience becomes very doable. In this case, simple weaving techniques learned with a wood/nail loom and fiber (or a French knitter) developed the skills we used to create a wire basket. In less than an hour, Olivia created a small copper basket and decorated it with a hanger and copper loops. She hammered the wire corner loops to add some interest.
Another teaching hint that I employ with younger students is scale…doing what would otherwise be very detailed work on a larger scale. You will note that my sample basket in the photo below is approximately 3”x3”. I didn’t want the process to be frustrating so I had Olivia create a larger basket which allowed me to hold the frame as she started weaving the copper wire. She also did the finish work filing the ends, bending the decorative wires, and hammering…this would have been difficult for her on a small scale piece and not nearly as valuable a learning experience because the progress would have been more difficult for her to see.
Sunday, April 3, 2011
Precious Metal Clay
Yesterday was a beautiful day for our Precious Metal Clay and Digital Studio Safari classes. We had eight eager students join us at the gallery for the day. Here are two pictures of silver metal clay projects during their a final polish/finish after patina in liver of sulfer. These silver pieces were created and fired during the class but students also created several bronze pieces that will be kiln fired this week.
Subscribe to:
Posts (Atom)


