Monday, December 12, 2011

Glass Casting

Glass casting has a number of different methods and I've been exploring them with students. The two pieces featured here were created by Becky Casady in a recent class. The first was designed with fiber paper carved and laid on the kiln shelf where glass was placed over it. The second piece was created with a clay model and then a cast was poured. Once the cast set, the clay model is removed and replaced with cullet (chunk glass) and fired in the kiln until molten. The cast is easily removed from the glass by breaking it away; the original cast cannot be reused.

Sunday, October 23, 2011

Painting with Light

Photography isn't my area of expertise but I couldn't resist sharing this incredible photo from my husband's weekend class "Painting with Light". Students worked with various light sources in the dark (flash lights, strobes, holiday lights, etc.) to create a variety of portraits, writings, ghost images, etc. The photo below was taken using a multi flash strobe and extended exposure as I walked through the scene. It resembles the imagery in "Nude Descending a Stair Case" by Duchamp.

Thursday, October 6, 2011

Pop Art


Elaina shows off a recent project - a Pop Art mirror. The project used about two dozen cans. The tricky part? Not cutting yourself on the cans as you open them and trying not to hit your finger while nailing them down. Otherwise, a quick fun project for most ages. If you like the project but would rather not create the mirror yourself, check on ETSY.com under "Pop Art".  For $200 and up, you can have one of your own.

Thursday, September 1, 2011

Zipper Jewelry

I recently found some zipper jewelry at our local Art Center store...very cute stuff and it couldn't be more simple so I decided to try to make a few pieces with a student (Olivia). The necklace is made up of zippers hot glued in a circle and then glued to a piece of leather with an adjustable tie. We also made a ring in the same manner adding a piece of elastic to accomodate most ring sizes. The left over zipper pieces were used to make earrings.


Wednesday, August 17, 2011

Silk Painting

On Tuesday August 16th, we hosted a surprise silk painting project for birthday girl Gennie (left) and her friend Quinn (right).  The girls created some amazing scarves and had a great time experimenting with the dyes and the heat setting process.  Nice work ladies!


Monday, August 1, 2011

Visiting Japanese Students

It may be hard to believe but not every culture is familiar with the American tradition of tie dye. Our studio hosted several students participating in a sister city exchange program last week. Here are some pictures of their finished projects. For more on their visit, check out our Face Book site under Madhaus Gallery.


Tuesday, July 26, 2011

Girls And Chocolate

Justice Alcorn - pictured below - enjoyed our Painting with Chocolate session this morning. Justice created a reverse painting and several desert toppers. And we sampled a little chocolate along the way.


Friday, July 22, 2011

Congratulations!

Two Madhaus students entered projects in the local county fair 4H competition and both won ribbons! Congratulations Claire and JoAnn!


Wednesday, July 20, 2011

Mosaics at Madhaus

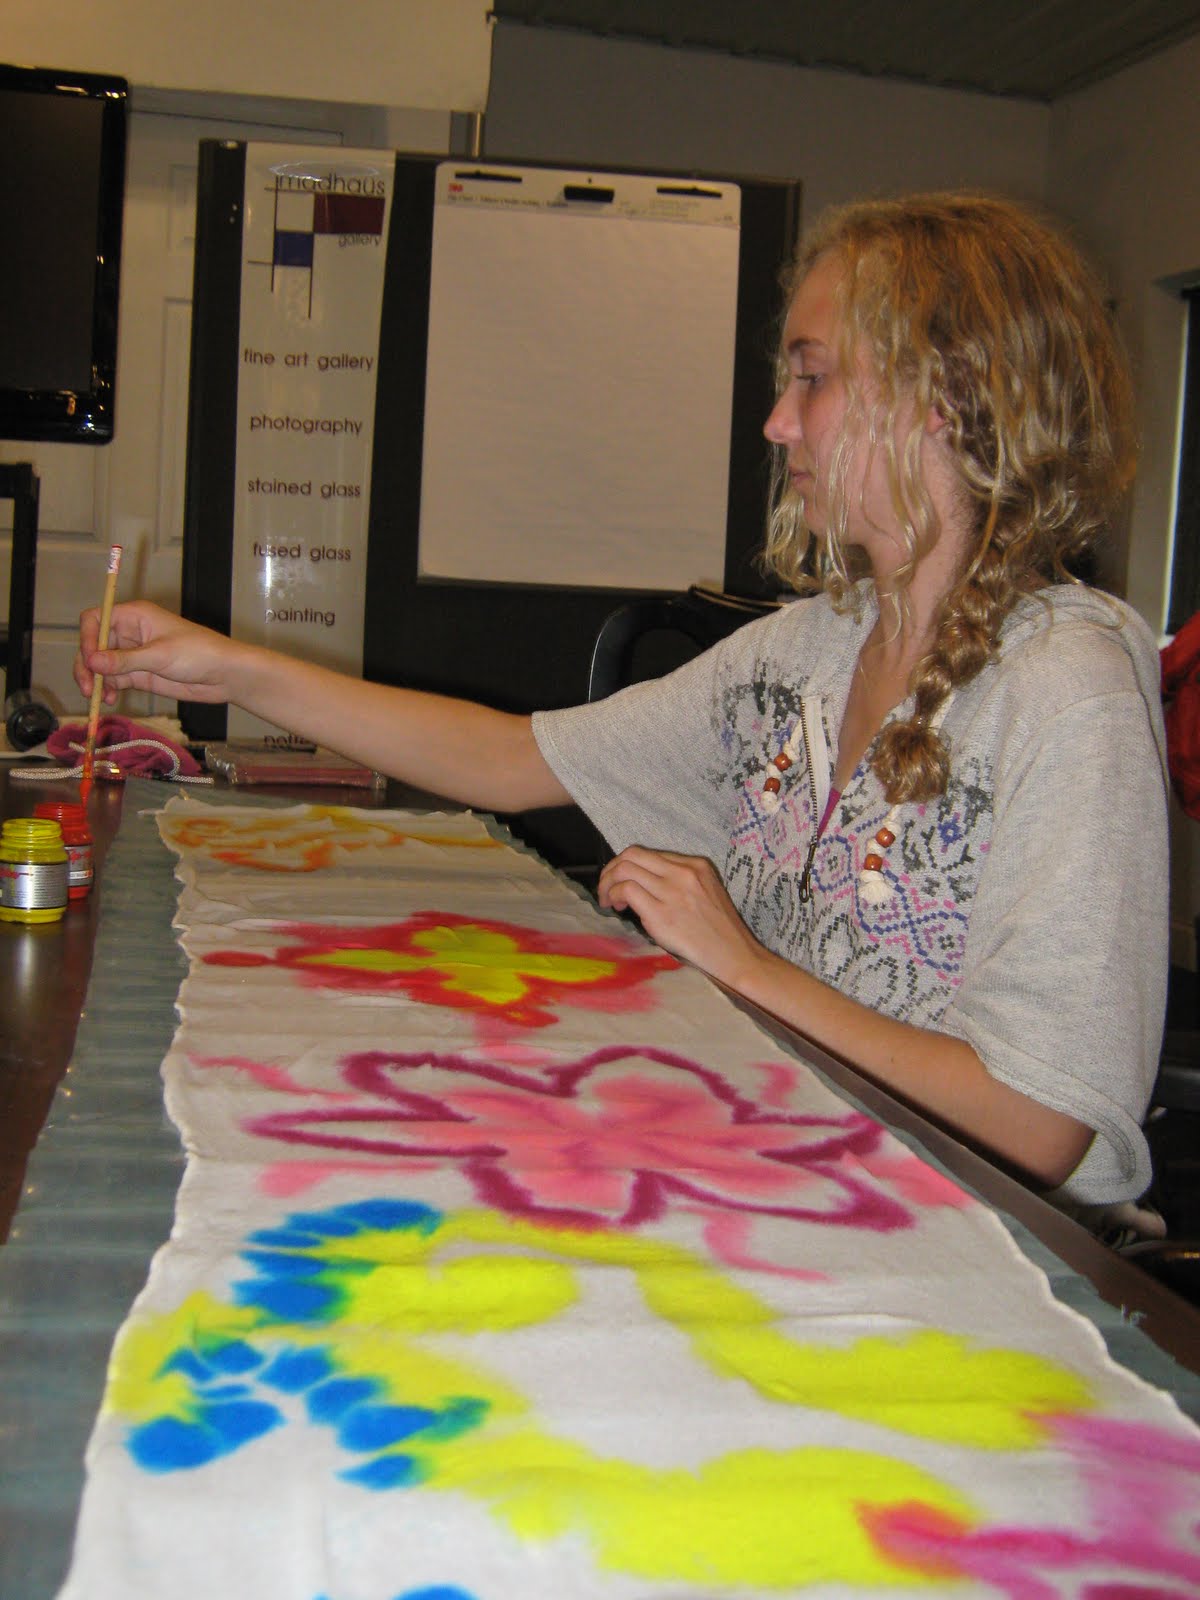
The past few weeks I've had several students and groups come in to work on mosaics. Mosaics can be created with a variety of materials including glass, tile, shells, beads, etc..  In our studio, I use primarily scrap stained glass, old boards, mirrors, glue, and grout to create wall hangings and stepping stones. In the picture, a student creates a mirror during a recent class.

Friday, July 1, 2011

Summer Fun

Over the summer I've had several of my regular students continue with weekly art lessons.  As FYI, we're also offering some group summer classes for young adults coming up on Mondays 10a-12p...for a list, you can check FaceBook or our web site at www.madhausgallery.com. The student below - JoAnn - is working with Fused Glass to create a possible candidate for her 4H county fair entry.   It is amazing how only a few weeks of training have improved her confidence with glass cutting.


Monday, June 6, 2011

Countryside Village

Another wonderful and warm show at Countryside Village this past weekend; great crowd and nice area.  My husband and I were both showing our work; I had both glass and paintings and he had photography. The picture is of my new tent and propanels...the set up for both mediums in one tent was a challenge but I was pleased with the ways it looked so I thought I'd show it off. This weekend I'll be showing a variety of paintings at the Omaha Summer Art Festival including much larger pieces.

Thursday, June 2, 2011

Solvy Scarf

I saw a cool summer scarf project at a local fiber store a few weeks ago and thought it would be the perfect reason to haul out my dusty sewing machine.  You can see in the picture below, I've gone a bit nuts for them because they are so fun to make. These lace like scarves are made of bits of fabric, string, yarn, roving - really pretty much anything goes - and a disolvable fabric. You sandwich the materials for your scarf between the disolvable fabric and stich until you've covered the entire length of your scarf. Then, rinse the item in water. The disolvable fabric disappears and you're left with a loose woven scarf.   Very cool!

Tuesday, May 24, 2011

A Lost Art


Stained Glass has a rich history which dates back to ancient Rome. The process of glass cutting and assembly with lead came has changed very little over hundreds of years but its use was confined mainly to religious themes. At the turn of the century, Tiffany introduced the copper foil method which caused an explosion of interest in stained glass and made it accessible to the masses. Over the past two months, I’ve worked with several students to explore these two very different techniques.  There are several hours devoted to the small projects in the photographs below but the students can take pride in their new skills and the long glazier tradition they now share.

John demonstrates grinding techniques.  Linda shows us her completed piece.


Monday, May 16, 2011

Food As Art

A wedding is a great reason to make pretty food. The photograph above shows a twist on a fruit salad made for a wedding last weekend...fruit kabobs with tropical fruits chosen for their colors and heartiness after slicing...star fruit, pineapple, strawberries, grapes, kiwi, and blue berries. Beautiful colors and a nice centerpiece.

Sunday, May 8, 2011

Art Show Season!

Show season is nearly upon us…albeit a little delayed this year since my husband and I didn’t venture out to the spring shows we normally attend in IL and IN.  This promises to be an interesting show season for me. I usually display glass; this will be the first outdoor show season traveling with paintings as well.  In preparation for a blur of a summer, I have spent most of the winter creating pieces and our gallery has never been more lavishly stocked with fine art than just before this show season. This is a great time to shop but in a mere two weeks, it will nearly all be packed up and ready to go on the road. Our season starts with a short one day show in Valley Junction (Spring Art Market in West Des Moines 5/22). For those of you who have taken our Art and Craft show class, this is a great opportunity to observe how a show artist works from “load in” to the end of the show “load out”. The piece in the photo below is one of 30 currently in the gallery.  You’ll find it nested among 30 paintings and a variety of other art pieces. Or, maybe you’ll see it on the road at an upcoming show.


Thursday, April 21, 2011

Elaina's Boat

A young student (Elaina) works on an acrylic painting with the impressionist view of a sailboat boat on the water...beautiful composition and color. I especially love the reflection in the water. Elaina assembled and primed her own canvas. She also finished the piece with Modge Podge gloss coating to preserve it and put hangers and wire on the back.

Bunny

The answer...bunny from the back-side!

Wednesday, April 20, 2011

Just For Fun - What is This?

I made this relief print the other day for a special occasion. My husband suggested that I use it as a little challenge for you...what is it? The answer will be posted later today.

Sunday, April 17, 2011

Chocolate Painting

Taking a monment to share another student moment from this week...painting with chocolate. It's actually a reverse print technique using chocolate instead of paper and ink. Joann seems pleased with her work!


Thursday, April 14, 2011

Quick and Easy Wire Picture Frame

Another short and sweet project for a young student learning to work with hand tools...this wire and wood picture frame. Students develop skills with a vice (to hold the wood while drilling), pliers, wire cutters, and drill.


Saturday, April 9, 2011

Edible Art!

We had a great group today for our “Painting with Chocolate” class.  This is a seasonal favorite…Easter (and Valentine’s Day of course) are the holidays of chocolate!  Today we created reverse paintings using some print making techniques. First the students prepared the base painting with pigments and coconut oil as well as some extruded chocolate lines. Then, the white chocolate was spread over the base. Once cooled, the painting is revealed by flipping and removing the wax paper. Additional surface techniques are then applied. We used extruded chocolate lines, metallic powders, and carving techniques to finish our pieces.  Beautiful and delicious – art never tasted so good!


Wednesday, April 6, 2011

Wire Works!

I had a small project lesson with one of my students that I wanted to share.  As I've mentioned before, I will often build on a skill with a younger student so that a project which might have been beyond their skill level without any experience becomes very doable. In this case, simple weaving techniques learned with a wood/nail loom and fiber (or a French knitter) developed the skills we used to create a wire basket. In less than an hour, Olivia created a small copper basket and decorated it with a hanger and copper loops. She hammered the wire corner loops to add some interest. 

Another teaching hint that I employ with younger students is scale…doing what would otherwise be very detailed work on a larger scale. You will note that my sample basket in the photo below is approximately 3”x3”. I didn’t want the process to be frustrating so I had Olivia create a larger basket which allowed me to hold the frame as she started weaving the copper wire. She also did the finish work filing the ends, bending the decorative wires, and hammering…this would have been difficult for her on a small scale piece and not nearly as valuable a learning experience because the progress would have been more difficult for her to see.


Sunday, April 3, 2011

Precious Metal Clay

Yesterday was a beautiful day for our Precious Metal Clay and Digital Studio Safari classes. We had eight eager students join us at the gallery for the day.  Here are two pictures of silver metal clay projects during their a final polish/finish after patina in liver of sulfer.  These silver pieces were created and fired during the class but students also created several bronze pieces that will be kiln fired this week.


Tuesday, March 29, 2011

Completed Paintings

In my last post, I shared a bit of the process I use to create the texture in my paintings. Here is the most recent work - complete. Let me know what you think,.

Sunday, March 27, 2011

Stormy Afternoon

I’ve been painting for years but this is the first art show season that I’m taking paintings on the road with me so I’ve been splitting my time between glass/kiln work and painting in the studio.  Throughout the past year I’ve been perfecting a heavily textured style with a number of different acrylic mediums. The video below shows me creating the first few layers of texture on my most recent diptych.  These paintings have multiple layers and it can take weeks to achieve a depth that creates a transformation I feel is necessary for viewing them…you are truly looking into or through the layers.  My interpretation of this work is the sense of calm that comes from stormy afternoons that demand relaxation as you watch the world go by outside your window.  But only you the viewer can interpret these “stormy windows”.  


Sunday, March 20, 2011

Fused Glass

The attached video is from our Fused Glass class on March 19th at the studio. The six students were captured creating their first project using a variety of fusible glass products including confetti, stringer, fusible paper, fiber paper, frit, and powder. The projects went into the kiln this morning!

Tuesday, March 15, 2011

Fiberpalooza!

I participated in an event this weekend called Fiberpalooza. I have a few friends that sponsored the event and asked if I would conduct classes throughout the day. I offered five: Needle Felting, Wet Felted Jewelry, Nuno Felting, Silk Painting, and Felted Soaps.  We had a steady group throughout the day and created some wonderful new pieces for the gallery as well as for students. The pictures below show some of the silk painting and nuno felting.


Friday, March 11, 2011

Beadmaking at Madhaus Academy 3.9.11

Here is a quick video of student JoAnn Neilson (11 years old), creating a glass bead in a recent class. This is JoAnn's second week and she is using several decorative techniques in addition to learning how to create basic bead shapes. The bead in the close up is an opaque brown base with silver leaf and clear green overlay. We put this feature bead on an organza necklace for her - beautiful!